-
AeroGCS CONFIG User Manual
13. Information and Support
The Information and Support section provides essential tools and resources to help you understand and maintain your drone system effectively. Follow the steps below to access and utilize these resources:
Access Information and Support
- Navigate to the Information and Support section in the left-hand menu.
- To access specific resources, click on any of the available options: Drone Details, Parameters, Log Analyzer, or Help.
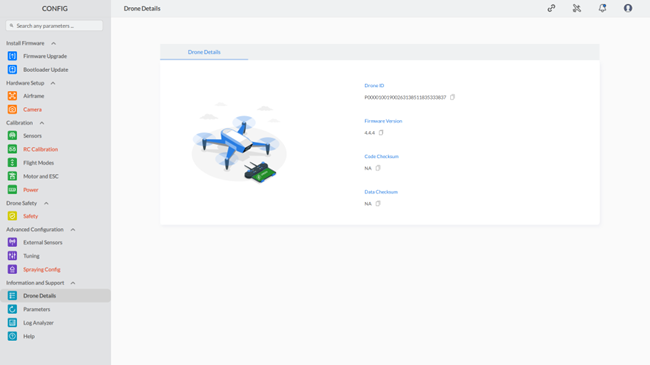
13.1 Drone Details
Click on Drone Details to view comprehensive information about your drone.
This includes Drone ID, firmware version, code checksum, and Data checksum. As shown
13.2 Parameters
In the Parameters section, you can import, export, and reset the settings that control your drone’s behavior. This section guides you through the steps to effectively manage your drone’s parameters.
13.2.1 Parameters
To access the Parameters tab and manage your drone settings, follow these steps:
Step 1: Access Parameters
- Select the Parameters tab from the Information and Support section. The Parameters screen will appear as shown in
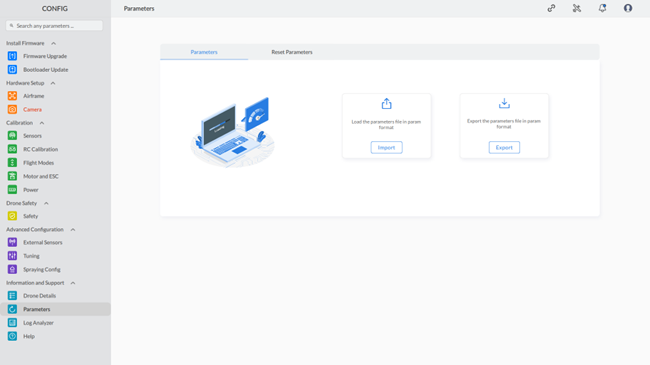
1. Import
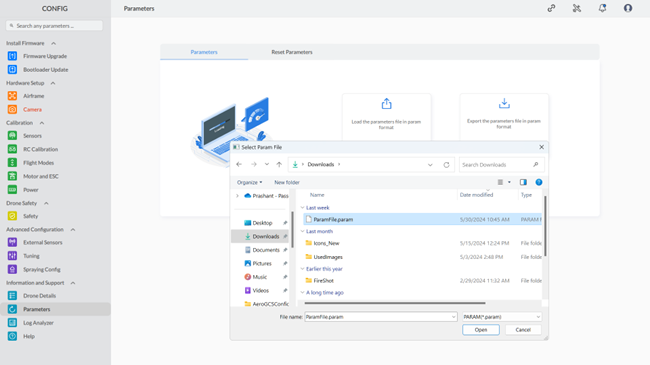
Importing Parameters
Step 1: Click the Import Button
- Click the “Import” button to open the Browse dialog box.
- Browse and select the parameter file with the .param extension. The screen will appear as shown
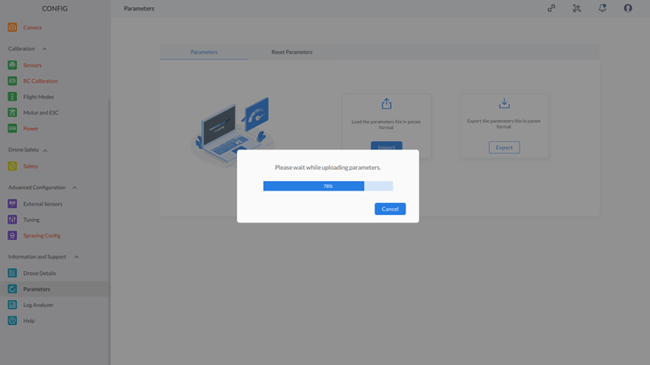
Step 2: Confirm Import
- Click on the “Open” button. A dialog box will appear, confirming “Do you want to start uploading parameters?”
- Click “Yes” to start uploading parameters, or “No” to cancel.
- Clicking “Yes” will begin the parameter upload process, as shown
Step 3: Complete Upload
- After the parameter upload is complete, a dialog box will appear saying “Parameter uploaded successfully.”
- Click the “OK” button to finish and continue.
2. Export
Exporting Parameters
Step 1: Click the Export Button
- To export the parameter file, click the “Export” button.
- A dialog box confirms “Parameter file saved at Location.”
- Click the “OK” button to finish.
By following these steps, you can easily import and export the parameter files, allowing you to configure your drone’s settings effectively. This functionality ensures that you can easily manage and transfer parameter settings, facilitating a smooth setup and operational process for your drone.
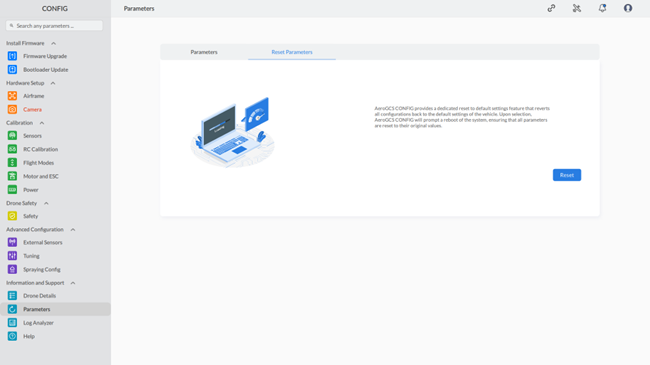
13.2.2 Reset Parameters
Reset Parameters
To reset the parameters and restore your drone to its default settings, follow these steps:
Step 1: Access Parameters
Select the Parameters tab from the Information and Support section and click “Reset Parameters”. The screen will appear as shown.
Click on the “Reset” button to initiate the parameter reset process. A dialog box will appear, confirming “Do you want to reset all parameters?”
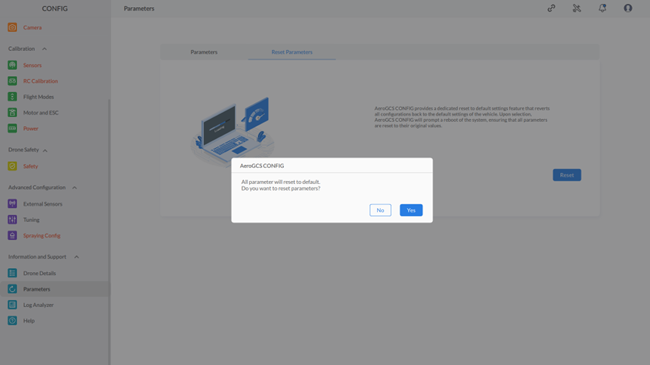
Step 3: Confirm Reset
- Click “Yes” to proceed with resetting the parameters to their default values, or “No” to cancel the reset operation.
- Clicking “Yes” will reset the parameters and display a dialog box saying “Communication link not established. Please wait.”

Step 4: Reconnect the Device
- Click the “OK” button on the dialog box. This will bring up the “Connect to Device” screen.
- Reconnect your device to complete the process.
By following these steps, you can reset the parameter settings of your drone to their factory defaults. This feature is useful for troubleshooting and ensuring your drone operates with the original configuration parameters.
13.3 Log Analyzer :
Note: Trial login users cannot access the log analyzer feature. |
The Log Analyzer in AeroGCS CONFIG allows users to review and analyze flight logs and data generated during drone operations. It provides insights into the drone’s performance, troubleshooting, and diagnostics.
Accessing the Log Analyzer
To access the Log Analyzer section within the Information and Support settings:
- Navigate to Information and Support.
- Select Log Analyzer.
You will be presented with the following screen:
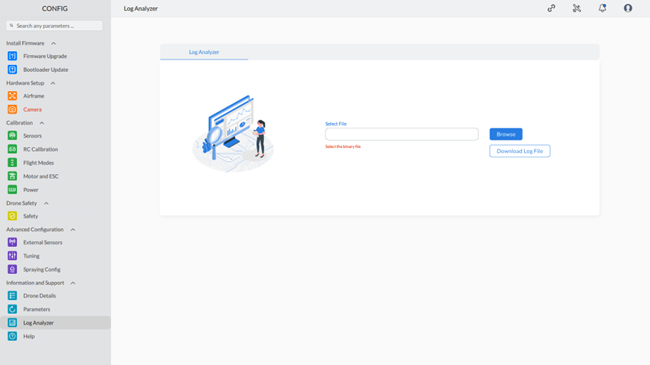
13.3.1. Download Log Files
This screen allows you to download log files in the .bin format from your vehicle/drone. To download a log file:
Click the “Download Log File” button.
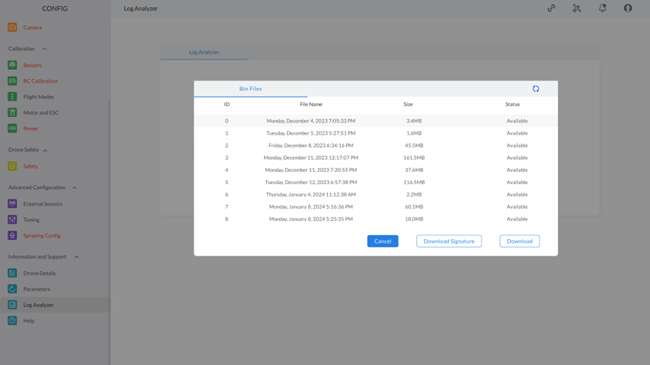
If you cannot view the log files, click the “Refresh” button to update the list of available log files.
1. Download Signature
To download the signature file:
- Click the “Download Signature” button and follow the on-screen instructions to download the Signature.
- Select the file you want to download by clicking the “Download” button.
- Click the “Yes” button to download the signature.
Note: The signature file is downloaded only for secure firmware. Before downloading the signature, ensure that your vehicle is landed and disarmed. |
2. Download .bin Log File
To download the log file in .bin format:
- Click the “Download” button.
- A screen will appear confirming that the log file has been saved to a specific location.
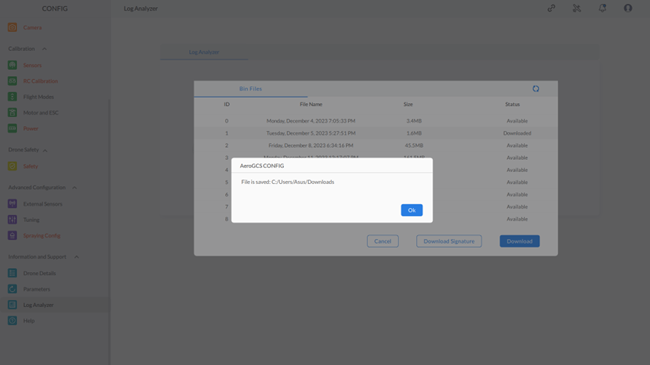
Click “OK” to continue.
13.3.2 Analyze Log File
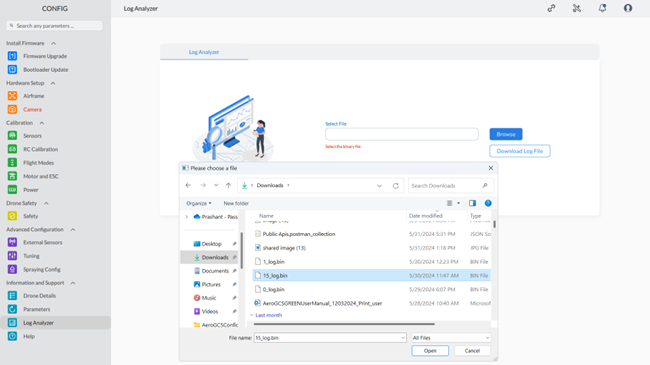
To analyze a log file:
- Click the “Browse” button to select a .bin file.
- Click the “Open” button to open the selected file in the Log Analyzer.
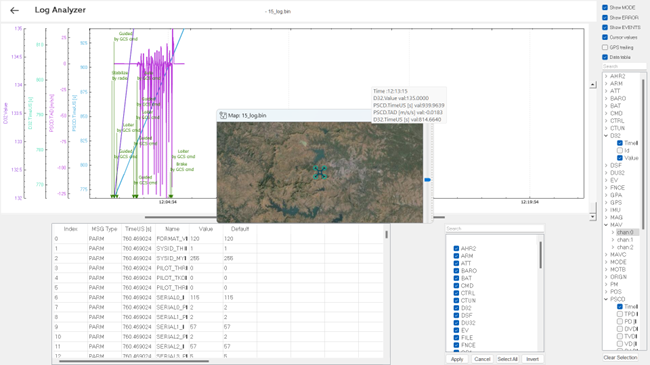
On this screen, you can analyze your logs. The right-hand side of the screen provides various options for analysis. By clicking on these options, you can display them on the analyzer graph and start analyzing the data.
Analysis Options
- Show MODE: Display the flight mode information.
- Show EVENT: Show events and important occurrences during the flight.
- Show Error: Highlight and display any reported errors or issues.
- Cursor Values: Present values corresponding to cursor positions on the graph.
- GPS Trailing: Visualize the GPS data trail on the graph.
- Data Table: Access a table containing detailed data points for analysis.
Additionally, by clicking on the parameters listed on the right-hand side of the screen, you can display the values for those specific parameters on the analysis graph for further examination.
After completing your log analysis, click on the “<-” back arrow located at the top left corner of your screen to return to the Information and Support settings.
13.4 Help
The Help section in the AeroGCS CONFIG software is designed to provide users with comprehensive support and guidance. It consists of two main sections: User Manual and FAQs.
Accessing the Help Section
- Navigate to the Advanced Configuration section on the left menu.
Click on Help to open the help configuration screen.
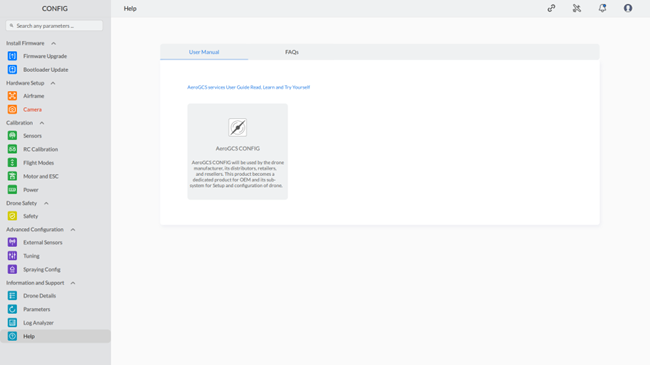
13.4.1 User Manual
The User Manual tab provides detailed documentation on how to use the AeroGCS CONFIG software. This section includes step-by-step guides, configuration instructions, and explanations of various features and settings.
- AeroGCS Services User Guide: A link to the user guide that you can read, learn from, and try yourself. This guide covers all aspects of the software, ensuring you have the necessary information to configure and operate your drone. Click on it to view the user manual online.
13.4.2 FAQs
The FAQs tab answers frequently asked questions, helping users quickly resolve common issues and learn more about the software’s capabilities.
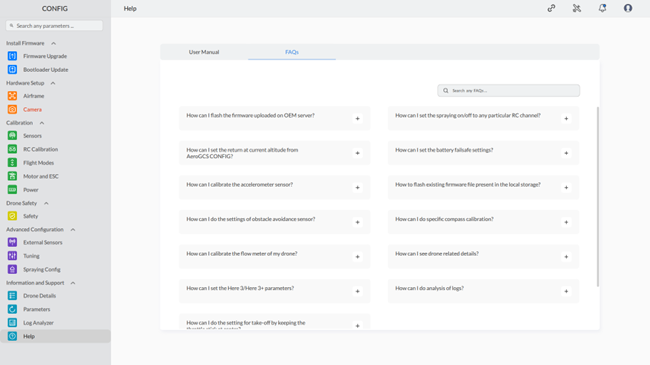
Key Features of the FAQs:
- Common Questions: Answers to users’ most common questions while using AeroGCS CONFIG.
- Troubleshooting: Guidance on how to troubleshoot and resolve typical problems.
- Feature Explanations: Detailed explanations of specific features and how to utilize them effectively.
The Help section is an essential resource for users of AeroGCS CONFIG, offering comprehensive support through the User Manual and FAQs. By utilizing these resources, users can effectively set up, configure, and operate their drones, ensuring optimal performance and functionality.